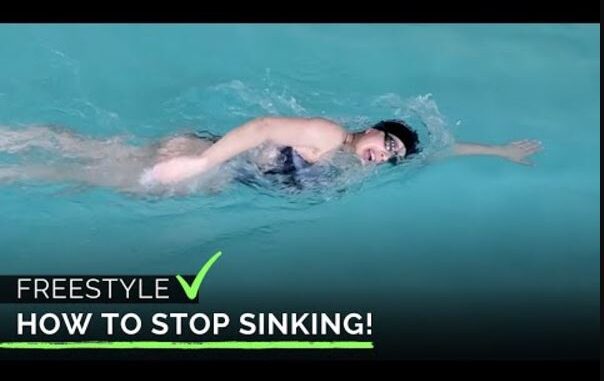
If your lower body sinks while swimming, it’s usually due to poor body positioning, lack of buoyancy, or inefficient technique. Here’s a detailed guide to understanding why this happens and how to fix it, with actionable tips to improve your swimming form.

Why Does Your Lower Body Sink?
- Head Position
- Looking forward instead of down lifts your head, causing your hips and legs to drop.
- Keeping your head too high disrupts your streamline position.
- Core Engagement
- A weak core means your body struggles to stay horizontal.
- Without core stability, your legs and hips naturally sink.
- Kick Technique
- An inefficient kick (e.g., kicking from the knees instead of the hips) can drag your legs down.
- Overkicking or underkicking also affects your buoyancy.
- Buoyancy Factors
- Muscle density, body fat distribution, and lung capacity can impact how buoyant you are.
- People with lower body fat often find it harder to stay afloat.
- Arm Stroke Timing
- Poor timing in arm strokes or gliding too long without propulsion can make your body sink.

How to Fix a Sinking Lower Body
1. Improve Your Head Position
- Look Down: Focus on keeping your gaze at the pool floor, not forward.
- Neutral Alignment: Your head should align with your spine; avoid lifting or tilting it.
- Drill: Practice swimming with a snorkel to isolate and adjust your head position.
2. Engage Your Core
- Tighten Your Core Muscles: Imagine drawing your belly button toward your spine.
- Plank Exercises: Incorporate planks, side planks, and flutter kicks into your workouts to strengthen your core.
- Drill: Use a pull buoy between your legs to feel the correct position without sinking.
3. Adjust Your Kick
- Kick from the Hips: Ensure your kick originates from the hips, with minimal knee bending.
- Small, Steady Kicks: Keep your kicks compact and controlled to maintain efficiency.
- Drill: Practice vertical kicking in deep water to develop proper propulsion.
4. Optimize Your Body Position
- Flatten Your Body: Think about becoming a “long, flat line” in the water. Your ears, shoulders, hips, and heels should be aligned.
- Press Your Chest Slightly Down: This subtle adjustment can bring your hips and legs up.
- Drill: Practice floating face down while focusing on staying flat and buoyant.
5. Improve Your Breathing Technique

- Breathe Efficiently: Avoid lifting your head too much to breathe; this causes your legs to sink.
- Exhale Underwater: Fully exhale underwater so you don’t need to rush your inhale.
- Drill: Practice side breathing while kicking with a kickboard.
6. Use Equipment to Practice
- Kickboard: Focus on improving your kick technique.
- Pull Buoy: Isolate your upper body and learn to maintain a horizontal position.
- Snorkel: Allows you to work on body positioning without worrying about breathing.
7. Focus on Your Arm Strokes
- Continuous Propulsion: Avoid long pauses during your stroke, as this can lead to sinking.
- Reach Forward: Extend your arms fully during each stroke to help balance your body.
- Drill: Swim with “catch-up” drills, where one arm stays extended while the other completes a stroke.
8. Train Your Mind and Body Awareness
- Visualize Correct Posture: Imagine yourself as a torpedo gliding through the water.
- Get Feedback: Have someone watch your swim or record a video to spot areas for improvement.
9. Strengthen Your Legs and Core
- Dryland Exercises: Perform leg raises, flutter kicks, and squats to build lower body strength.
- Yoga or Pilates: These can enhance flexibility and core stability, which help in maintaining balance in the water.
10. Relax and Streamline
- Don’t Overthink: Tension can make you sink. Stay relaxed and let the water support you.
- Streamline Push-offs: Practice pushing off the wall in a streamline position to get a feel for gliding horizontally.
Example Training Plan
Week 1: Focus on Basics
- Day 1: Floating drills and head position adjustments (30 minutes).
- Day 2: Kickboard practice, vertical kicking (20 minutes), and core exercises.
- Day 3: Snorkel-assisted swimming to improve alignment and breathing technique.

Week 2: Incorporate Drills
- Day 1: Catch-up drills (20 minutes), pull buoy practice (10 minutes).
- Day 2: Vertical kicking, flutter kicks, and plank exercises (15 minutes each).
- Day 3: Combine floating drills with arm stroke corrections.
Week 3: Fine-Tuning
- Day 1: Swim without aids, focusing on streamlined body position.
- Day 2: Record yourself swimming for feedback.
- Day 3: Mix all drills into one session for holistic improvement.

Quick Tips
- Always warm up before swimming to activate your core and leg muscles.
- Experiment with different drills and equipment to discover what works best for your body.
- Gradually build endurance and strength; consistency is key.
By focusing on these techniques and practicing regularly, you’ll correct your lower-body sinking issue and enjoy more efficient, streamlined swimming.
Leave a Reply